Click HERE .. Get a blogtips at http://blogguideshare.blogspot.com/ Its FREE

Editing Software

It is so many photo editing sofware around us, make us difficult to choose. For me it is a very good to have lot of competitor among them as it will lead for improving in photo editing software in the future. Let them compete, do their job. For us, we need to judge what is the best for us. Once found which suit for us, use it. That simple.


1. If you want to edit images quickly with basic tools check out Fotograpfix photo editing software. It is a portable app and light-weight, you can put in your USB key and carry with you.


Fotografix allows photo editing with basic tools for changing brightness/contrast, color balance, saturating the image and adding filters like motion blur. It doesn’t replace your Adobe Photoshop or other full feature graphic editor but it allows you to do digital photo enhancement, photo retouching etc. It has support for layers for non-destructive editing and scripts support for easy automation of frequent tasks.
Fotografix is a portable freeware for Windows and weighs 310KB. The app is currently in beta but works perfectly for simple image editing. Supports all well known image formats.


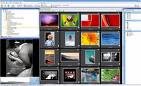
2. ACDSee Photo Editing - ACDSee Photo Editor is another photo editing software solution. Photo Editor is brought to you by ACD Systems. The company provides variety of software programs related to photo and graphic design for home user and professional. ACDSee Photo Editor is one of them, with the program user can create personalized greeting cards, scrapbook pages, invitations, manage and organize photo.


3. Adobe Photoshop Element

Photoshop Elements is a photo editing software - though not as advanced as Photoshop, but with excellent tools for image edition far beyond the basics. Apply incredible effects, organize and retrieve automatically your picture from any device (from cameras to hand phone) and share them.
It contains most of the features of the professional version, but with fewer and simpler options and for a fraction of the cost. It also supports a simplified color management system, and excludes detailed soft-proofing. Though it is targeted at non-professionals, its features are superior to most software of this kind.
New features include: greater control over color and lighting; brush away wrinkles, unwanted objects, and other flaws; make selections to easily adjust specific areas of a photo, adjust skin tones for a more natural look.


4. Paint Shop Pro X


An ideal introduction for anyone working with digital images and web graphics, this beautifully illustrated guide to Corel's Paint Shop Pro X, a photo editing software  provides coverage of all the tools and features needed to edit and enhance digital photographs. It's packed with a wide variety of real life examples, eye-catching visuals, and numerous tips and tricks.


5. Photobie
Photobie is photo editing software that combines features amateurs can use with advanced tools professionals will appreciate. Photobie is free for personal use with no Pro upgrade to pay for -- all features are free. Photobie is also a community of people ...
6. Photo and Graphic
7. Many more ...


Have .. fun

Panoramic scene


Panorama Shooting

We often see some great panoramic pictures, such as a town panorama, a panorama of river shore extension, you will be surprised at how your own camera shot not such an effect. Stand-point high-point shoot it well and shoot the panoramic scene is very small. Narrow the focus or stand close to the point of making it but we can not accommodate the entire panoramic picture. Is your camera angle is not enough? Here's to introduce the techniques under the panoramic photo.
Before the advent of digital imaging technology, people get panoramic pictures there are two ways: using a dedicated panoramic shot rotation or professional division of the darkroom hand-stitching, no matter which method, ordinary fans are very difficult to do. APS cameras boast of "Panorama" is only the use of a large ultra-wide-angle lens view, strictly speaking, called the "cover photo on" more appropriate. Digital cameras and digital image processing technology make it easy to panoramic photography, as long as there is a digital camera and image processing software can run the computer such as ULEAD 360, anyone can try to make stunning panoramic view photo.


1. Point shooting
Stitching panoramic photos used to have certain requirements, such as exposure value is close to similar colors, followed by arrangement, slightly overlapping each other so when shooting some precautions.


2. Exposure parameters
Now more than a few digital cameras have a special panorama mode, in this mode, the camera will automatically shoot panoramic photos required to set exposure parameters, for there is no camera panorama feature to note the following:
a) metering the use of the average measured light, use manual exposure or exposure AE Lock Exposure locked parameters, the same set of panoramic photographs taken can not be changed during the aperture, speed, ISO, resolution and other settings;
b) using a fixed white balance use the automatic white balance may result in different Photo colors are inconsistent.


3. Focal length
Some people think that shooting panoramic photos as much as possible to make a large angle, it should be the shortest focal length (wide-angle lens or wide-angle zoom lens side), so require fewer pieces of mosaic pictures. In fact, this is a misunderstanding, when the province of trouble shooting when splicing trouble. Because the effect of a strong wide-angle lens perspective, particularly in the edge of the screen, prone to distortion, it is difficult to do when the seamless stitching. Therefore, deformation should be used when shooting in a smaller side-focus or telephoto shooting, and shooting half-way is advisable to change the focal length.


4. Shooting techniques

When shooting in accordance with a certain order (from left to right or from top to bottom, etc.), the best is to use tripod steady rotation, rotation axis perpendicular to note when shooting, point by point to pan around the shooting or when shooting should pay attention to the camera height, angle of the same generally do not use flash because flash light can cause far past dark. Adjacent shooting to have a certain overlap between the two photos, Canon, Sony and other brands of some of the digital camera panorama mode, there are auxiliary LCD display prompts. To avoid drastic changes in light conditions, the time (such as the line of cloud cover days) taken to avoid exposure between various pieces of the screen that much difference. Should be taken to avoid shooting occurred at the interface of moving objects (such as vehicles and pedestrians). While the choices are clearly marked location as a convergence point serves a number of automated software identification, splicing, we recommend choosing not clearly marked, easy to mix the site as a combination of ministries, such as water and the distant mountains, so not easy to see the seam stitching together .
After reading the above points, I think you make panoramic photo shooting skills in a certain understanding, as long as the more hands-on practice, you can shoot great panoramic photos.

Potrait Shooting


To create a portrait requires good planning. The image quality is not only the camera moves, but it can display a sense of personality and expression of the people in these photographs. To consider not only the subject of the image, but also the lighting, sets, scenery, locations, poses, facial expressions and colors. Although you may not be able to take such a beautiful portrait photos professional photographers, but by learning some basic techniques, you can create your own photographic portraits.


Here are some tips and suggestions to make a good portrait.


How do I make someone smile at the camera?


Make sure you shoot subjects in a state or a good mood to be photographed. Suppose you want to create an image of a child, make sure it was not in a state of fatigue or hunger. Also make sure your subject of the photo is not in a state tired of having to make a face and eyes became more tense. You can give some time to relax or enjoy a light meal before the meeting starts shooting. With a pause to allow time to relax and enjoy snacks, you'll build a better interaction with the subject of your photo. Be friendly and talk with him which will help more relaxed. But do not make the situation until the subject was funny laugh out loud. Because this might make his eyes became crossed and bloodshed in the face more. Try taking a picture with a different look. Other images you create, the more possibility to get the best picture that shows the character of that person.


How to handle people who use glasses?


Glasses can cause the reflected light and create glare. Therefore, you can see in the viewfinder or LCD screen of your device, if it is a disturbing reflection of light. If it is the reflection of light on the subject of your glasses photos, you can ask him to move his head slowly to the reflected light is lost from the midpoint of his eyes. You can also ask for a little head down, but be careful to avoid creases in the chin if it is too low.


What about clothing and appearance?


If you want to take a photo of a group of people to pay attention to color clothes. Use pleasing colors. Or you can also ask them to use the same color. If you want to take a picture of the person, the color of clothing is also noteworthy. If you want to photograph the great, then he should wear a dark color. Conversely, if you lean subjects or small, then instruct him to use light-colored clothing. Next, make sure the clothes do not wrinkle when photographed. If the person uses the tie to see if his tie is straight and well cared for. Then make sure his hair was neat. Your eyes may not be able to notice strands of hair and disturbing, but the camera captures the evidence. So if you want to take a picture of a woman, you may notice the composition used was appropriate. Factors to consider when the image is an outside parking or outside the room? When taking outdoor photos, consider where the background image. Choose trees, flowers, wooden fences, or walls of the house as a backdrop. Do not take a picture with busy background activities such as roads, electric cables, or a busy business district. This may reduce the beauty of your photos. Remember your subject in the portrait photo is one that will be photos and not the substance.


Factors to consider when the image is covered or in the room?


If you're shooting indoors, you can invite the subjects of your photos to sit in a chair or sofa placed in front of a brightly colored walls or plants near the room You can also set the background image is the work and activities, favorite subjects you photograph. For example you can put a table or sewing equipment as a backdrop.


What is the appropriate goal for portrait photos?


You can use the lens of 105 mm to 150 mm for taking portrait photos. If you can not change or adjust your camera lens, such as a pocket camera, you can adjust the distance between you and the subject being photographed. Try closer or away from the subject to obtain the position of the most appropriate image.


How the composition of the right image?


You can leave a little distance from the image of your object in the image. This distance is useful if you make a frame for the image so you do not cut part of the body image of your subject. Then position the face or the eyes of your photos on the field approximately one third of the page or on the side or bottom of your photo. In the science of photography, the technique is known as the rule of thirds. You can also view the image about the center of your photo.


What about the position and attitude about the picture?


Make sure your photo subject in the relaxed position, either standing, sitting or lying down. If the face is too rounded, have your photo submitted a short play head or body so that only part of his face to the light. This would make the face thinner. Note the position of other bodies, such as hands and feet. Make sure the body position in the natural position or natural. Try to be the subject of your photo holding something or making a natural position. Do not let your hands straight down at your sides. This is often novice photographers, but will be awkward in photos.


How can I make a picture about the partner?


Ask them to tilt his head slightly to one another. This is to prevent those same heads high. Try placing a nose high at a height of eyes of others.


What about lighting?


If you take pictures outdoors, the best time is in the afternoon, because the air more calm and light colors warmer. Avoid the sun too hot, so make the subjects' eyes became narrow your photos that are too glaring. If the sun is too hot, ensure the sun shines from behind the subject of your photo. In effect, this would cause his face to be dark because of the shadow of the sun shining from behind. You can use the flash or the flash or the flash to illuminate the shadows of the sun. You can also use a reflector or easier to use the white board to reflect sunlight into the shadow of the sun. When taking photos indoors, use the flash for illumination. You can also take pictures in the window that has brighter lighting. Do this in an area that has a white wall or light, because it will reflect light from your camera flash so that further enhance the lighting.

Tip - taking photo at night


Do you like to take photos at night? I know I do. There's something magical about them - pictures of the moonlight sky and dazzling neon lights convey a special something that daytime photos can't.

Tip 1: Use Long Exposures

The key to successful night photography lies in a long exposure. We’re talking about exposures measured in seconds. When a long exposure is used, more light is allowed into the camera, allowing the details in your night photo to be captured.
The problem with using long exposures is that you may shake the camera, resulting in poor pictures. The way around this is to use a tripod. I prefer to install a tripod with a shutter-release cable to ensure that I don’t jolt the camera at all.


Tip 2: Take Control Shots
One problem with digital cameras is that there are always some pixels on the image sensor which are bad. When taking day photos, these defects are not discernible. However, they are pretty obvious in night photos. How do we correct these? Here’s a simple way – take a control shot, then use image editing to subtract out those bad pixels.
This is how it works. The next time you’re out to take night photos, go ahead and snap a picture of Scene A, as you normally would. Then, when it’s convenient, take a photo of the exact same Scene A again, but with the lens cap on.
Now you will have two images, one night shot and one control shot (with the hot pixels). Load them up in say, Paint Shop Pro. Switch to the control shot and select Edit and Copy from the menu. Next, switch to the night shot and paste the copied image as a new layer. Then, select the new layer and change the Blend Mode to Difference and click OK. You’ll get the correct night shot with the hot spots subtracted out.


Tip 3: Try to Capture Motion
With a long exposure, you have many creative options when it comes to photography. This includes capturing motion. For example, have you ever wondered how those professional photographers shoot pictures of trails of car lights as they zoom down the highway at night? It’s all due to long exposures. Try to keep this in mind the next time you’re taking a night photo – you don’t have to restrict yourself to still images.


Tip 4: Play with the Aperture
In addition to shutter speed (which determines exposure time), you can play around with the aperture size of your digital camera. There are two scenarios here. If you set a long exposure, try to use a small aperture to avoid overexposing any stationary lights. in the picture. On the other hand, if you set a short exposure, try using a larger aperture to avoid any motion in your shot.


Tip 5: How to Use the Flash
As a general rule, I turn the flash off when taking night photos. There are some exceptions though – one specific example I can think of is trying to shoot a subject in the foreground, with motion trails of car lights in the background. In this case, bring along an external flash unit and shine it on your subject manually. Set a long exposure, then have your subject wait until the picture is taken.


Tip 6: When to Take Night Photos
When’s the best time to take night photos? I usually like to take them during dusk when colors and details are easier to capture. I’d recommend that you do some research on the evening before the photo shoot. Decide on the location, then come back the next day to take the photo at dusk.


Conclusion
Hopefully, this article has taught you some tips on taking better night photos. The important concept to remember is that a long exposure is need for good night photos. This means you need to keep you digital camera really, really still. Once you understand that, the quality of your night photos will definitely improve.

Object distance, image distance, and magnification


In lens formulas it is convenient, called away from a number of points "to measure the main points" to. There are two of them, one for the front of the lens and one for the rear properly as the primary and the secondary principal point principal point. While most expect the formula lens object distance is measured from the front main point, which most are calibrated scale so that the distance from the object to read the film plane. So you can not use, need the distance on your focusing scale in most calculations, if you are only an approximate distance. Another interpretation of the main points is that a (probably virtual) object on the primary principal point of incident light is formed from the front of the back seems to take a (probably virtual) image maintained exactly in the secondary principal point with magnification.
"Nodes" are the two points, so that a light beam is formed in the front of the lens and headed straight to the front hub had gone straight from the rear hub in the exact same angle to the axis of the lens as the input ray. The nodes are identical to the major points where the anterior and posterior media are the same, eg air, so that can be used interchangeably for most practical purposes the article.
Are in simple double-convex lenses, the two most important points somewhere inside the lens (actually 1/n-th the way from the surface in the middle, where n is the refractive index), but in a complex lens they can be almost anywhere, even outside the lens or the rear main point before the front main point. In a lens with elements that are fixed relative to each other, are the main points fixed relative to the glass. The internal focusing lenses or zoom the main points of the rule to move relative to the glass and each other during zooming and focusing.
When a camera lens is focused at infinity, the rear principal point is exactly one focal length before the movie. To find the front main point, take the lens from the camera and let light from a distant object through "backward". Find the point where the image is created, and the measure on the lens a focal length. Some lenses can mainly ultra Wides, do not do this because the image is not formed before the front lens. (All this assumes that knowing the focal length. I suppose you can trust the numbers the manufacturer's enough for educational purposes.)
How to reach the object to the front main point.
Si rear principal point to image distance
Focal length f
Magnification M
1/So 1/Si = 1 / f
M = Si / So
(So-f) * (Si-f) = f ^ 2
M = f / (So-f) = (Si-f) / f
If we interpret f Si as an "extension" of the lens on infinity focus, then we see that this extension is inversely proportional to a similar "extension" of the object.
For the rays near and almost parallel (the axis that we are) as "paraxial" rays can approximately model most lenses with just two planes perpendicular to the optical axis and is located on the main points. "Almost in parallel" means that the angles involved, theta ~ = sin (theta) ~ = tan (theta). Medium ("~=" be approximately equal.) These planes are called principal planes.
The light can be thought of as processes in the foreground main level, then jump up to a point in the rear principal plane to be exactly the same shift of the axis, while breaking even be thought of (curved). The angljavascript:void(0)e of refraction is proportional to the distance from the center where the beam on the plane and inversely proportional to the focal length of the lens. (The "front main level is related to the front of the lens. It could be behind the rear principal plane.)
Terms of the paraxial approximation of the principle of "levels" are not real planes, but turning areas. With a lens that is free of coma aberration is one of the classic (), the principle planes that could be called more properly equivalent to the refracting surfaces are centered spherical sections around and object and image point for which the lens is.

ISO

Using the ISO on your camera to calculate a change in the photographic exhibition


ISO stands for International Standards Organization, an administrative agency based in Europe that provides standards for a wide range of topics. The initials are used for the film speed or speed cameras in photography, where the rate sensitivity of the light. In the past it was known as ASA.


Most good digital cameras have a removable ISO rating. A camera with an ISO setting of 100 is twice as sensitive to light as a camera with an ISO of 50. More film, more sensitive to light. If you take a low light image with a digital camera using a rating of ISO 200 or slow up.


Most digital cameras have ISO settings variable to be used for different types of photography. If you pull on a clear high speed or low sensitivity of ISO 50 or 100 should do. In light of my scenes a low ISO of 400 or more a better choice.


This is similar to a film camera you buy. Each film has an ISO rating and work with the same principles as your digital camera. A film speed of 400 is twice as fast as the speed of the film 200, which means it allows twice the amount of light.


Note that if you have a high ISO number of your image can be shown to have noise. The noise will affect your images a grain expansion. All the photographers want noise free images are so selective use of ISO is important.


If you do not know what setting to keep your camera is ISO 100. With this setting you have a very colorful picture.


ISO settings can also be important in determining exposure. As you know, the diaphragm and the shutter in the camera monitoring the amount of light that your camera. The ISO of your camera or film will also calculate the progress difficult.


To explain using this example.


You're in a scene and want to use an exposure of f/22 with the shutter speed to 1 / 2 seconds and the camera is set to ISO 100. The scene you go take a good shot, but there is running water in a hot scene and you want to put in the water.


A shutter speed of 1 second will do, but if you keep opening set to f/22 you overexpose the shot. The simplest is the ISO of your camera set at 50.


A setting of 50 ISO and f/22 for 1 seconds, it's like a setting of ISO 100 and f/22 at 1 / 2 seconds. If you shoot with a film camera you need to change the film ISO 50.


As mentioned earlier, a photography setting of ISO 100 is good for portraits, landscapes and nature. Remember when you take very bright days to change the ISO and 50 days to change boring at ISO 200.

Sharp images

Keep sharp images by controlling the depth of field

Depth of field can be described as the distance from front to rear in a single image is clear enough. The parts of an image outside this should be fuzzy and the depth of field. There are some ways to the depth of focus: surveillance using a small aperture, focus on one point away from your camera or using a lens of short focal length.

Let us look at the tools necessary to control depth of field.

Aperture and f / stops: The opening is an opening in the center of the lens that light passes. The amount of light passing through an aperture is given by f / stops. Plus the F-stop more light that passes through the opening. Opening a complete stop of f / double the amount of light the camera. F / 4 is twice the light of f5.6.

By selecting a small or narrow opening (f/16 or more), all or most of the scene is quite strong. It is ideal for landscape photography. Using a small aperture increases depth of field.

By choosing an open or large (f/5.6 or below), you decide what part of your image is sharp. This function is ideal for taking pictures of wildlife, portraits, sports and small objects. Using a large aperture reduces the depth of field. This means that only a small portion of the image is sharp.

The higher the f / number, more means more

There are about twice the depth of field behind the focus of attention, because for her, using a diaphragm.

The selective use of in-depth controls also ordered field. If you focus on a point near the camera offers a shallow and short field. If you focus on one point away from the camera depth of field will be larger.

The focal length of your lens controls the depth of field. A short focal length lens in any environment, greater depth of field.

Having received a good understanding of the depth of field, it is now time to practice. If a landscape scene that you want all areas of the scene to pull Sharp, so you greater depth of field conditions. Open your camera to a setting of f/16 or longer if the global stage left scored.

Wildlife and floral images is only part of the image sharp. An aperture of f / 4 you can with a narrow depth of field and a smaller area of sharpness.

Some lenses can be purchased with a depth of field scale on them. They are very useful for landscape photography where the lens, so that all parts of the image is sharp

Landscape Images


Improving our Landscape Images composition

The landscape photography can be difficult, but with good composition and good natural light can be made easier.
All the world's cameras, film and other photographic equipment are only tools for landscape photos. Cameras do not think for themselves. If we use a digital camera or film, photography same principles apply.
We did not comply with many rules to produce great landscape images, but they know that your images will be more fruitful. There are two striking features in the landscape photography: how to compose your image, and how to use natural light in a given situation.
Let's start with light: There are three basic qualities of light intensity, direction and color.
Intensity: refers to the strength of the light. When the sun high in the sky, the light can be hard and strong. The cloudy days bring soft light and inoffensive.
Direction: It is the placement of light. There are three categories of light placement: front, rear and side lighting. Side lighting produces more texture between light and shadow.
Color: The color of sunlight varies with the circumstances and time of day. When the sun shines at the beginning or end of day, color of light is much warmer and give rise to many dramatic scene.
Insight days will develop your ability to see. You begin to see the beauty of light in a different and exciting.
In landscape photography, it is very important to ensure the composition. A normal scene can be transformed into a close attention to detail. The composition is all about how you arrange the elements.
Here are some ideas you may find useful.
Head with the lines: To lead with the rules in most of the scene will draw your viewer into your image. These lines should not be immediate. Lines, including numbers, riverbanks or fences, can operate successfully.
Interest original: objects in the foreground simple can have your landscape a greater sense of depth. Use a small aperture (f/22) to keep the whole scene developed.
Natural settings: Frame your scene with the elements around you. This will highlight the most important part of the image. The trees make great natural settings.
These are just a few broad base, and combined with a good eye, you have everything you need to get the best of photography - especially landscape photography. These are just a few lines at the beginning, but like all rules, they are there to be broken.

Lens aperture


Understanding how lens aperture works in photography

Setting the size of the opening is the perfect way to add punch to your images. The opening is an opening in the center of the lens that light passes. This opening is the shape of a circle and can open and close - the larger the diameter of the opening of more light through your lens.

The amount of light passing through an aperture is given by f / stops or f / number. Plus the F-stop more lights that passes through the opening. Opening a complete stop of f / double the amount of lights the camera. F / 4 is twice the light of f5.6.

The following is the complete set of numbers f / f / stops.

f / 1 f/1.4 f / 2 f/2.8 f / 4 f/5.6 f / 8 f/11 f/16 f/22 f/32


By choosing an open or large (f/5.6 or below), you decide what part of your image is sharp. This function is ideal for taking pictures of wildlife, portraits, sports and small objects. Using a large aperture reduces the depth of field.

The higher the f / number, more openness - meaning that if you shoot at f / 8 you have more light than if you shoot at f/11.

By selecting a large number f / (a small aperture f/16 or narrow and more), all or most of the scene is quite strong. It is ideal for landscape photography. Using a small aperture increases depth of field.

Use your diaphragm correctly will improve your photos.

Aperture and depth. When you focus on a set point with a large number f / (f/16) and the area behind the sharp point of attention - the area between these two points is known as depth of field. If you are a small aperture at f / number (f / 2) its field of interest is clear - each image is not clear.

Use your diaphragm properly with the shutter exposure control.

Basic of Photography


Here's my basic tip of photography

A great way to be creative with your camera is the exact use of the shutter. The shutter is ideal for adding movement to your images or it can also be used to freeze an image.

The shutter is a mechanical device that length of time that light is allowed to act on the movie controls.
Most standard devices allow us to use a range of between 16 seconds and 1 / 1000 seconds.

You might ask why use a slow shutter speed of 16 seconds. Many landscape photographers would use a long shutter speeds when shooting in low light - sports photographers use fast shutter times when they need to freeze motion.

By using a shutter speed of 1 / 125 seconds to avoid all security in the fuzzy image - as a result of the movement, you need a tripod if the camera in hand to do the same.

What follows is a range of shutter speeds. Each time you press the shutter button to double click on the light and when we close the pane by a half of light. Opening the shutter to 1 second to two times lighter than a ½ second.

1 / 500 1 / 250 1 / 125 1 / 60 1 / 30 1 / 15 1 / 8 1 / 4 1 / 2 seconds 2 seconds 4 seconds ...

This component can also be reduced by half: 3 seconds can double the amount of light as 1.5 seconds.


The shutter is creative use of scenery when you take pictures of sports photos. If you want to add motion to your image a slow shutter speed may give a somewhat more common. Not more than take pictures of rivers. Use a slow shutter speed at the water intake will cause the water to blur, leading printing film.

Always use a tripod and slow shutter speeds that prevent blurred images.

In contrast, a fast shutter speed of 1 / 250 are used to pull the game or if the topic you need to shoot and still alive. Most wildlife photographers would use a fast shutter.

The best means of control over the shutter speed your camera to get practice. Try the following test for a better understanding of the shutter. Find a scene with fast movement of water - Put your camera atop a tripod. Take five images at different shutter speeds.

Take the first photo of a second and take half of the next. Then the rest of the images using the same sequence. When you're ready to hear how the water is with a slow shutter. Compare the five images. If done properly, the effect of water mist when shooting with slow shutter.

With the creation of vote shutter will add to your photos - the practice will help you master the technique.